金融类网站设计西安网站开发服务多少钱
Eclipse下Maven的集成
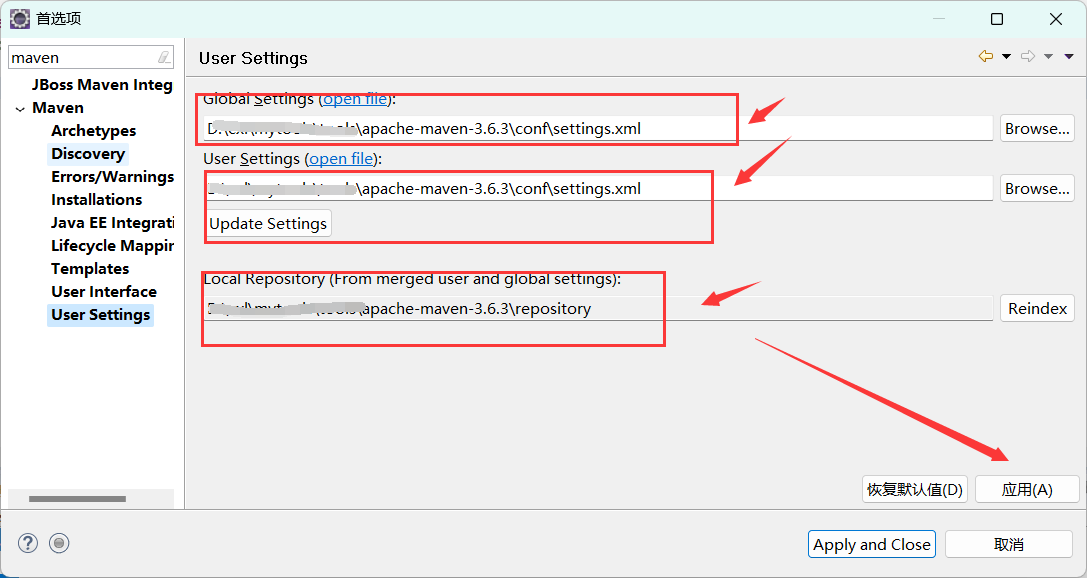
2.1指定本地maven环境
参考:Eclipse的Maven创建_叶书文的博客-CSDN博客_eclipse创建maven项目
- 指定用本地maven

- 指定maven仓库设置和地址
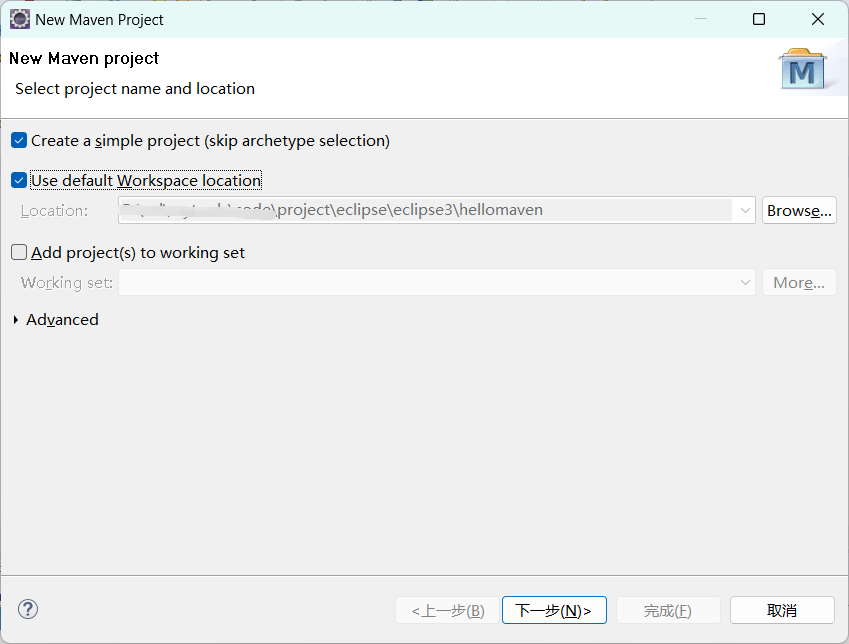
2.2创建maven项目
1.新建

2.目录设置
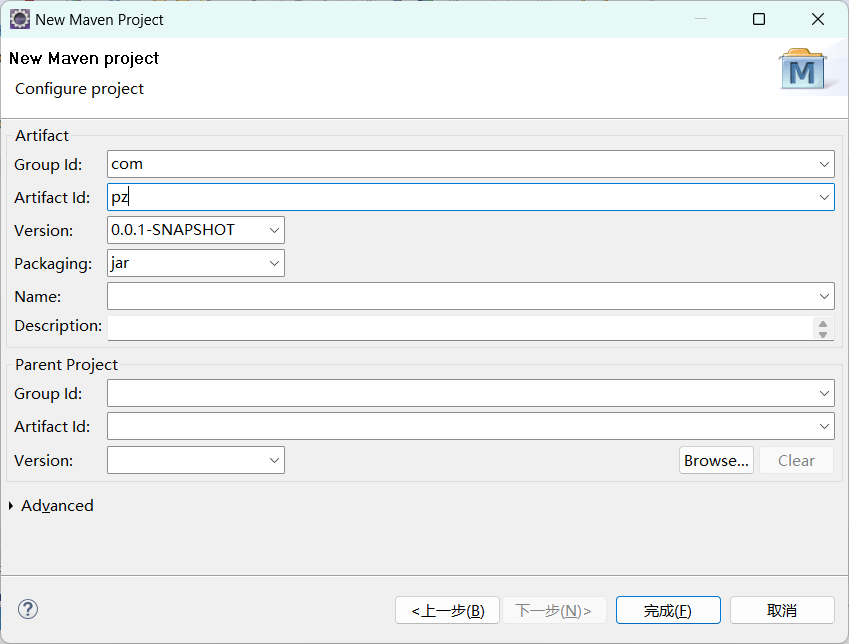
3.坐标设置(随便写就行)
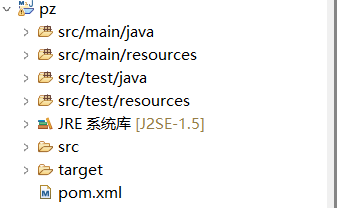
4.目录结构
2.3配置pom
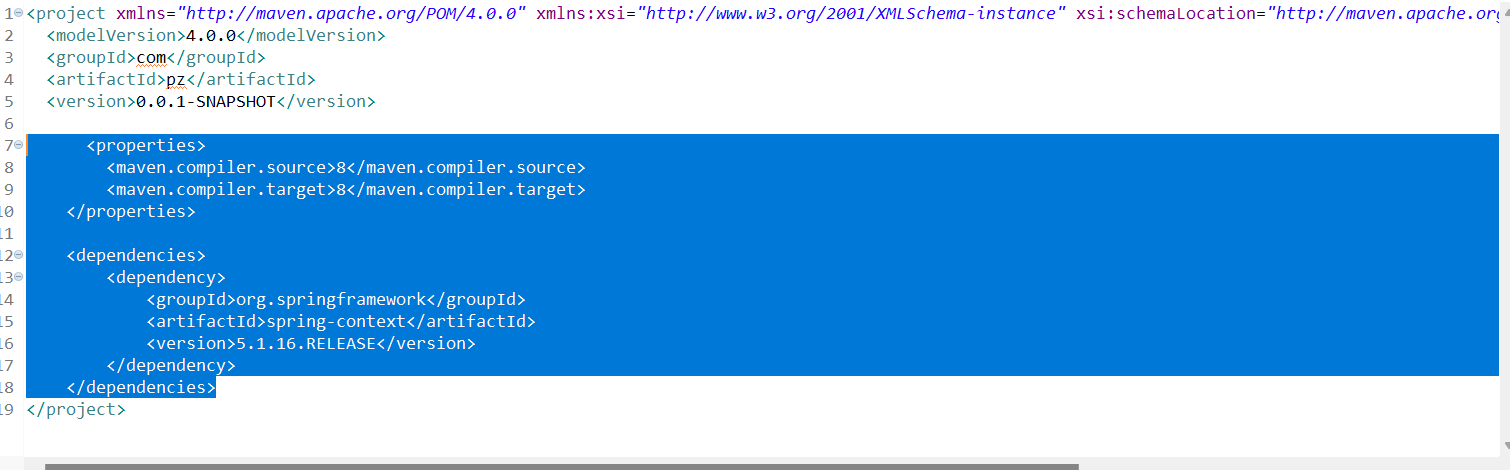
导入spring的依赖
把代码直接复制进去
      <properties>
        <maven.compiler.source>8</maven.compiler.source>
        <maven.compiler.target>8</maven.compiler.target>
    </properties>    <dependencies>
    	<dependency>
    		<groupId>org.springframework</groupId>
    		<artifactId>spring-context</artifactId>
    		<version>5.1.16.RELEASE</version>
    	</dependency>
    </dependencies>
2.4src/main/java中创建Java代码
1.创建的目录结构如下
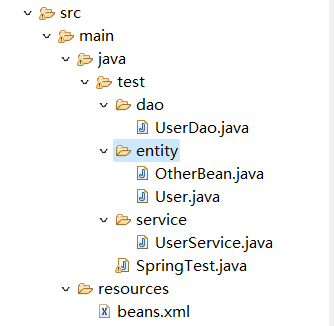
1.entity代码
package test.entity;import java.util.Date;
import java.util.List;public class User {
    private int id;
    private String name;
    private String password;
    private int age;
    private Date birthday;    private OtherBean otherBean;    private List<String> favorites;    public int getId() {return id;}    public void setId(int id) {
        this.id = id;}    public String getName() {return name;}    public void setName(String name) {
        this.name = name;}    public String getPassword() {return password;}    public void setPassword(String password) {
        this.password = password;}    public int getAge() {return age;}    public void setAge(int age) {
        this.age = age;}    public Date getBirthday() {return birthday;}    public void setBirthday(Date birthday) {
        this.birthday = birthday;}    public OtherBean getOtherBean() {return otherBean;}    public void setOtherBean(OtherBean otherBean) {
        this.otherBean = otherBean;}    public List<String> getFavorites() {return favorites;}    public void setFavorites(List<String> favorites) {
        this.favorites = favorites;}
}
package test.entity;public class OtherBean {private int id;public int getId() {return id;}public void setId(int id) {this.id = id;}
}2.dao代码
package test.dao;public class UserDao {	public void login() {
		System.out.println("查询数据库成功!");}}
3.service代码
package test.service;import test.dao.UserDao;public class UserService {    private UserDao userDao;
//	内部方法
    public void login() {
    	System.out.println("执行业务操作....");
    	userDao.login();}//    get和set
    public void setUserDao(UserDao userDao) {
        this.userDao = userDao;}    public UserDao getUserDao() {return userDao;}}
2.5创建beans.xml
beans.xml是Spring的配置文件,这是采用xml的方式进行配置的spring项目
- 有自动装配和手动配置两个方面的东西
<?xml version="1.0" encoding="UTF-8"?>
<beans xmlns="http://www.springframework.org/schema/beans"
       xmlns:xsi="http://www.w3.org/2001/XMLSchema-instance"
       xsi:schemaLocation="http://www.springframework.org/schema/beans
        http://www.springframework.org/schema/beans/spring-beans.xsd"
    default-autowire="no">    <!-- 设置autowire="no",不使用自动装配即使用手工装配 -->
    <!--    <bean id="userService" class="service.UserService" autowire="no">-->
    <!--        <property name="userDao" ref="userDao"/>-->
    <!--    </bean>-->
    <!--    <bean id="userDao" class="dao.UserDao"/>-->    <!-- 设置autowire="byName",使用Bean名字进行自动装配 -->
    <!--    <bean id="userService" class="service.UserService" autowire="byName"/>-->
    <!--    <bean id="userDao" class="dao.UserDao"/>-->    <!-- 设置autowire="byType",使用Bean类型进行自动装配 -->
    <bean id="userService" class="test.service.UserService" autowire="byType"/>
    <bean id="userDao" class="test.dao.UserDao"/>
</beans>
2.6运行启动类测试
1启动类代码
package test;import org.springframework.context.ApplicationContext;
import org.springframework.context.support.ClassPathXmlApplicationContext;import test.service.UserService;public class SpringTest {
    public static void main(String[] args) {
        ApplicationContext context =
                new ClassPathXmlApplicationContext("beans.xml");
        UserService userService = (UserService) context.getBean("userService");
        System.out.println(userService.getUserDao());
        System.out.println(userService==null);
        userService.login();}
}- 运行成功,说明bean注入成功
