前端做网站一般用什么框架响应式布局网站实例
以下是对MOS管MOS管为什么会有夹断,夹断后为什么还会有电流?该电流为什么是恒定的?的一些心得体会。
1. MOS管为什么会有夹断?
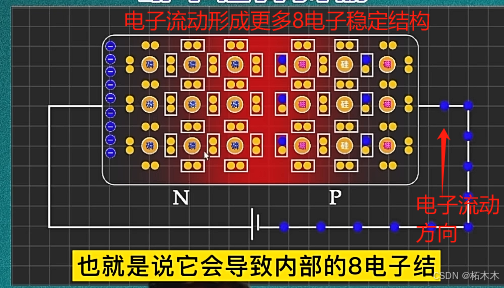
可以认为D极加压使得D极的耗尽层增大(原因是N极接正极,P极接负极,电子被吸引到N极靠近正极的那一侧,电子从P极推到N极的过程中8电子稳定结构增多,耗尽层增大),使得耗尽层将靠近D极的N沟道给堵住了,也就是夹断。
2.为什么夹断后为什么还会有电流?
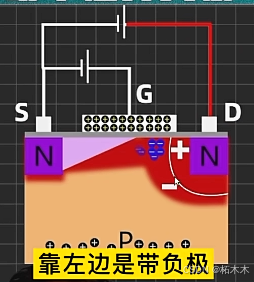
因为耗尽层有强大的内电场,该电场会将更多电子拉进到D极,再流回到电源正极。该PN结的电场方向是P指向N而耗尽层的电场方向(即内电场的方向)则相反,因此是靠近N极的是正,靠近P极的是负,则会对电子施加一个向着D极的力,将其拉到D极。
3. 为什么横流区的电流是恒定的?
因为D极的电压加大,耗尽层越厚,靠近D极的N沟道被堵得越厉害,但是又因为D极电压加大,拉过来的电子也就越多(也可能是耗尽层拉过来的),二者之间形成了一个平衡,最后电流恒定。
4. 为什么G极加压可以抬高横流区的线?
因为N沟道变厚了。