做的网站太大网站建设基本步骤顺序
每当在需要写文章的深夜,我的思绪经常跟不上我的笔,即便是说出来用录音机录下,再书写出来,也需要耗费大量时间。这个困扰了我很久的问题终于有了解决的办法,那就是录音转文字软件。它像个语言魔术师,将我所说的每一个字词都转化为纸上的印记,不再让我错过任何重要的信息。
那么你们了解免费的录音转文字app有哪些吗?别着急,让我为你们介绍三款软件吧!
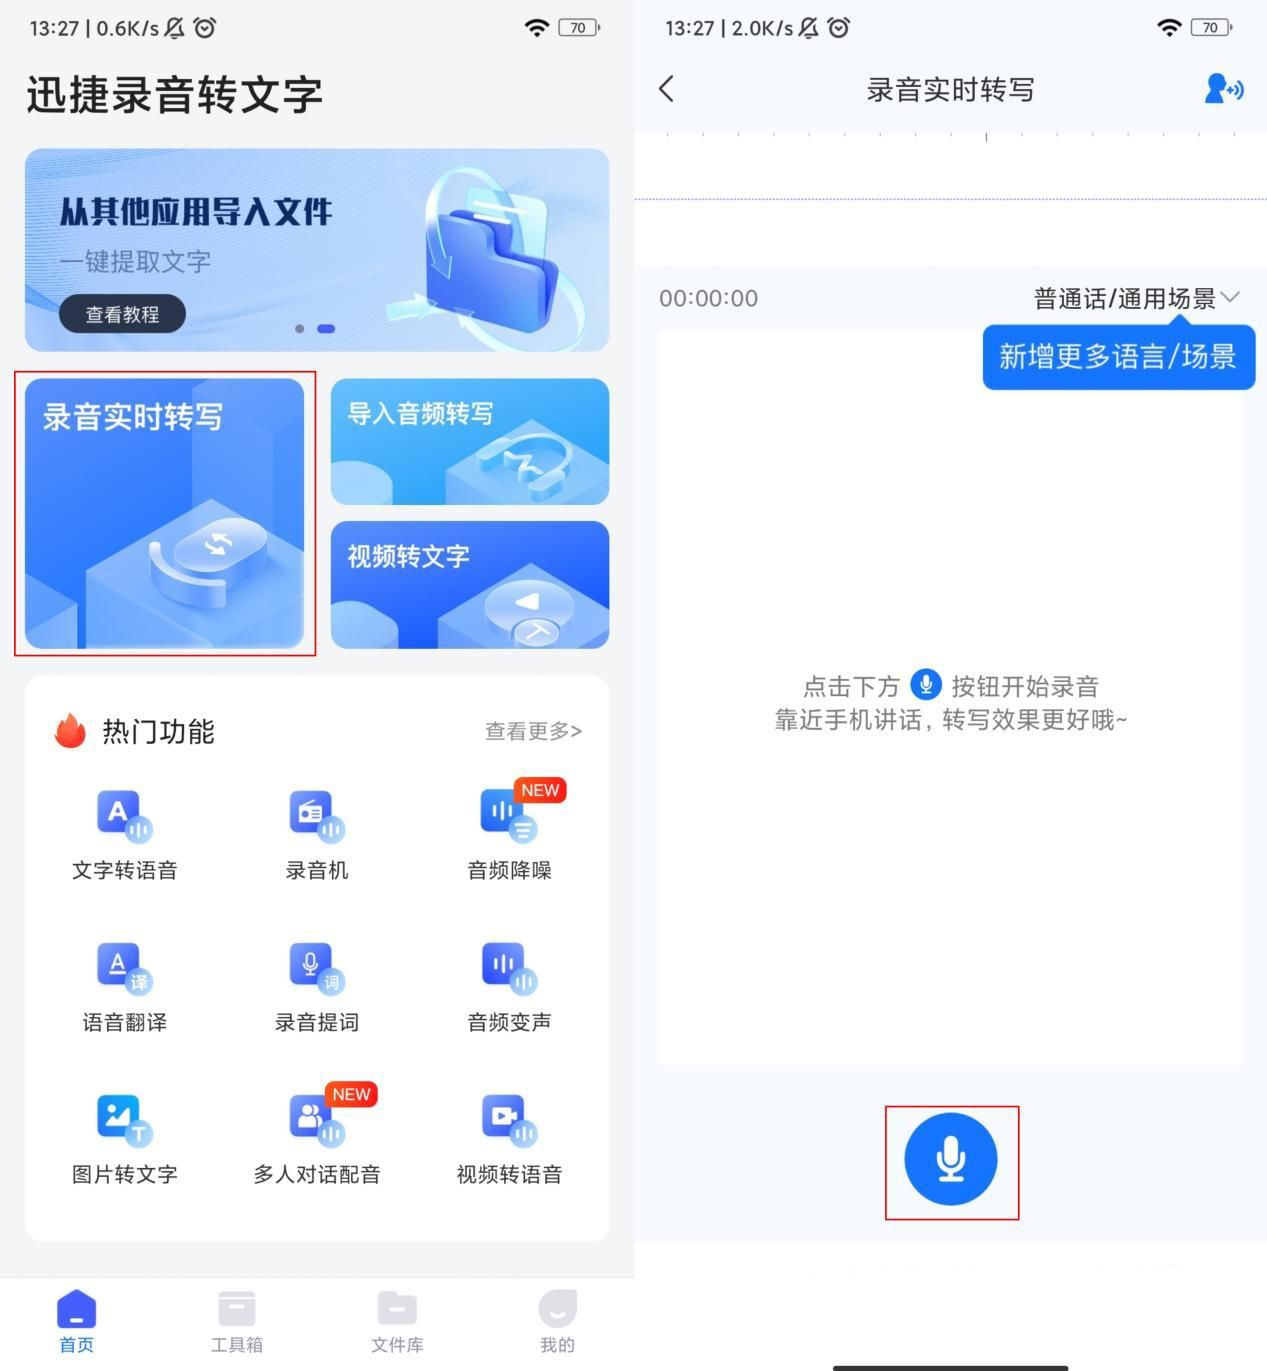
转录软件一:录音转文字工具
转录速度:快
结果完整度:高
错误率:低
推荐指数:5颗星
迅捷录音转文字是一款非常友好且实用的手机软件,它的实时录音转文字功能可以即时地将你说的话转写成文本,这个过程非常快,并且完成度非常好。它还提供了一系列实用的功能,例如视频转文字、音频降噪、语音翻译等,可以帮助你处理更广泛的事物。此外,它还支持多语言转写,让你能够自如地切换不同的语言环境。
转录软件二:Speechnotes
转录速度:快
结果完整度:中
错误率:低
推荐指数:4颗星
Speechnotes是一款创新的语音转文字工具,它以其优雅且简洁的界面和卓越的转写准确度而闻名。无论你是需要将一段长篇的演讲稿、一段心灵零碎的思考还是一份重要的会议记录转化为文字,Speechnotes都能轻松胜任。它的转录过程不仅迅速高效,而且准确度很高,几乎可以做到无误差。

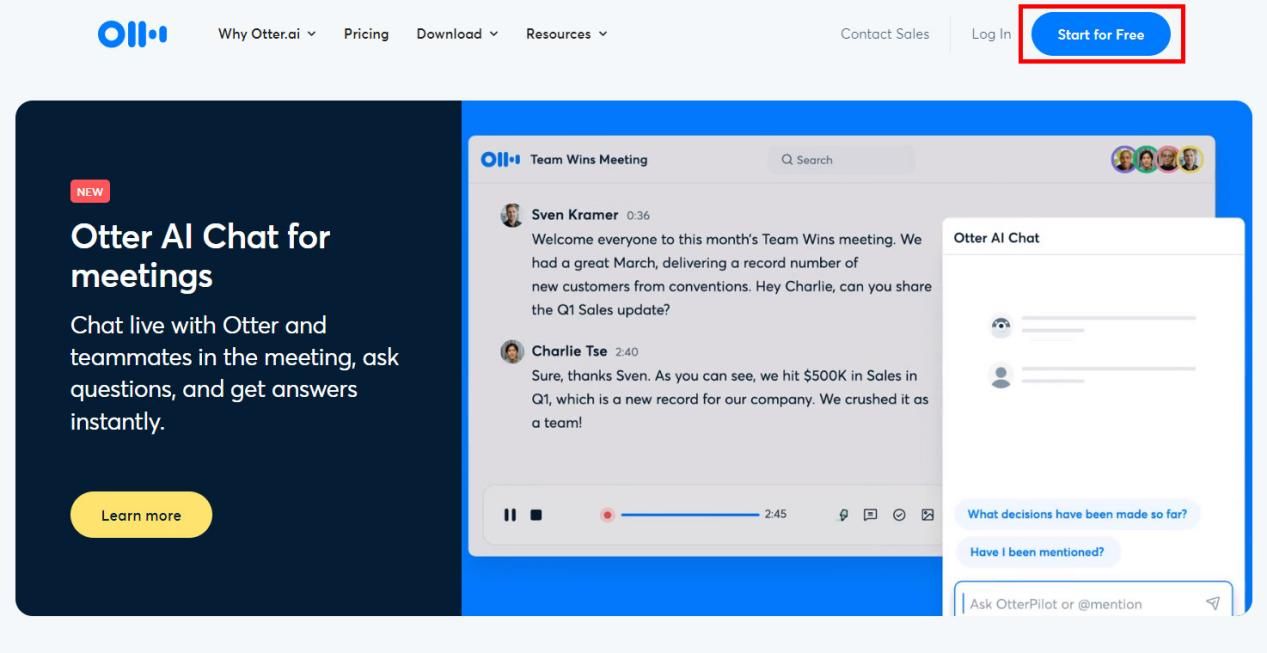
转录软件三:Otter.ai
转录速度:慢
结果完整度:高
错误率:低
推荐指数:4颗星
Otter.ai是一款令人惊叹的语音转文字工具,它能够将你的声音转换为准确、清晰的文字。无论是会议记录、采访笔记还是个人创作,Otter.ai都能帮助你高效地将声音转化为文字。使用Otter.ai,你只需启动录音功能,开始自由畅谈。无论是你的演讲、面试、课堂讲座,甚至是日常对话,Otter.ai都能捕捉到每一个细节,将其打印成如诗如画的文字。
看完关于“免费的录音转文字app有哪些”的文章,你们是不是又学到了点什么呢?让我们一同走进录音转文字软件的世界,感受这项神奇的技术所带来的便利吧!