做网站服务怎么赚钱个人如何注册公司代理
接上篇:
MyBatisPlus学习笔记二-CSDN博客
1、核心功能-IService开发基础业务接口
1.1、介绍

1.2、引用依赖

1.3、配置文件

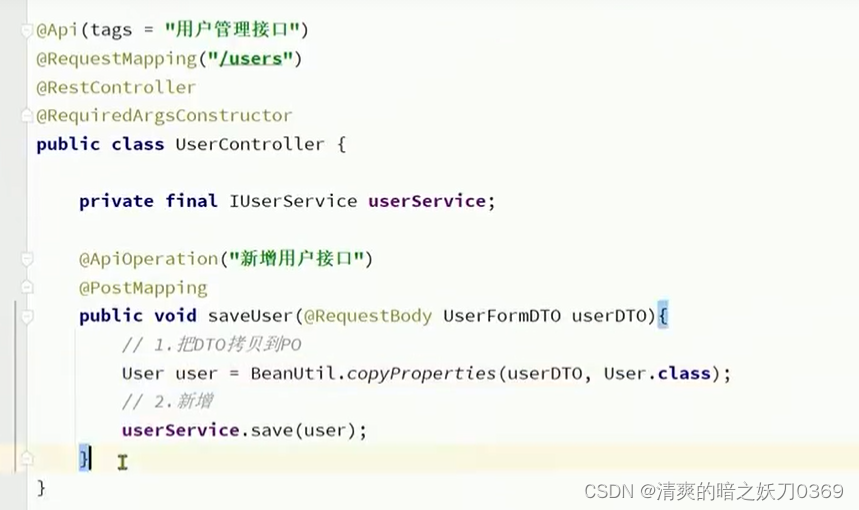
1.4、用例-新增
1.5、用例-删除

1.6、用例-根据id查询

1.7、用例-根据ids查询

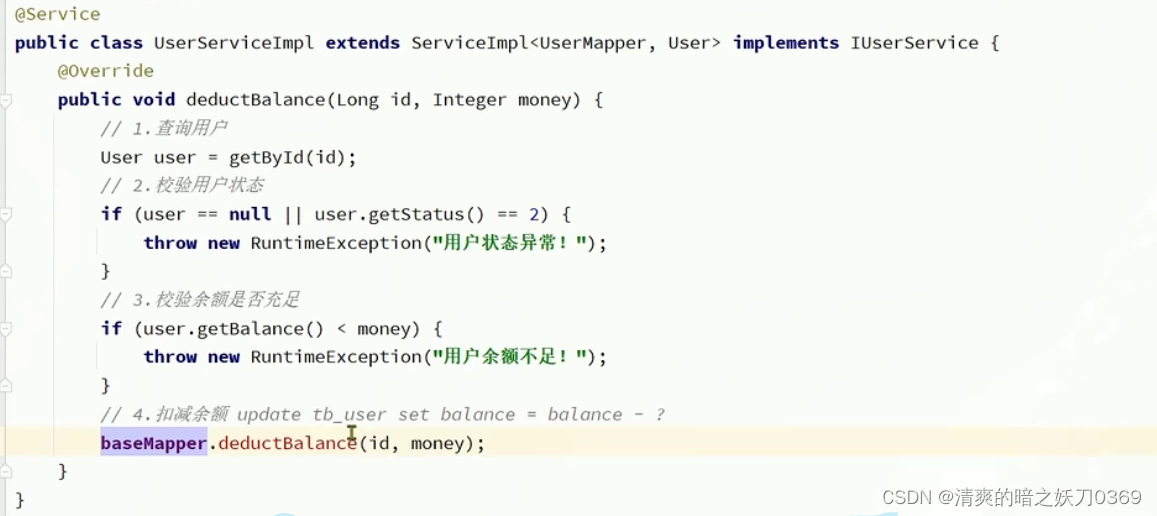
2、核心功能-IService开发复杂业务接口

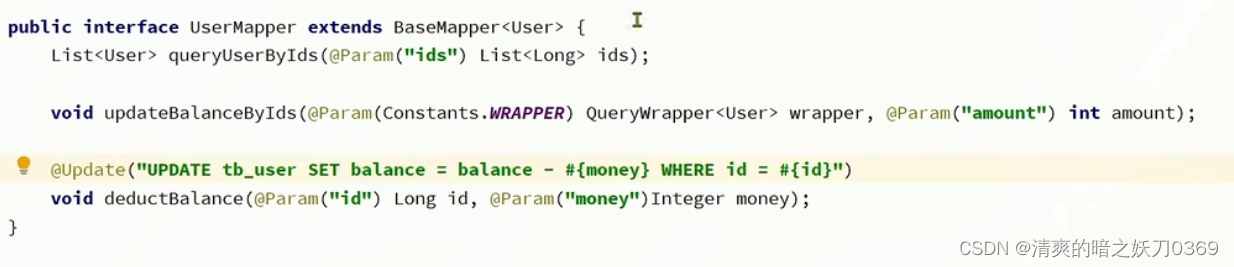
2.1、实例-更新


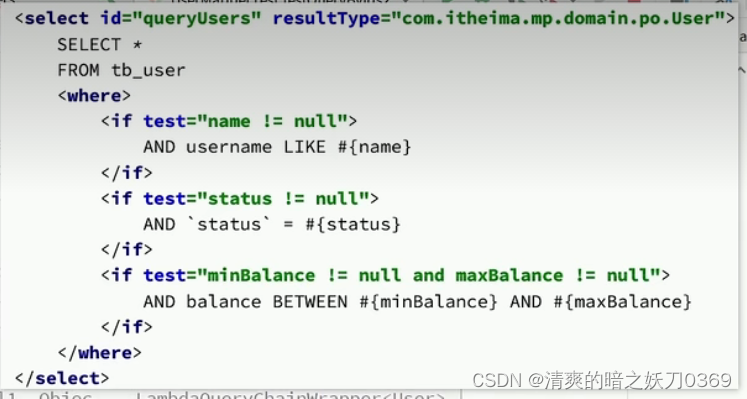
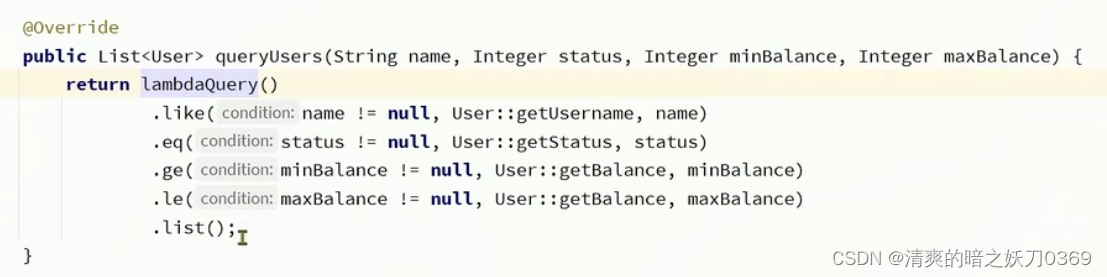
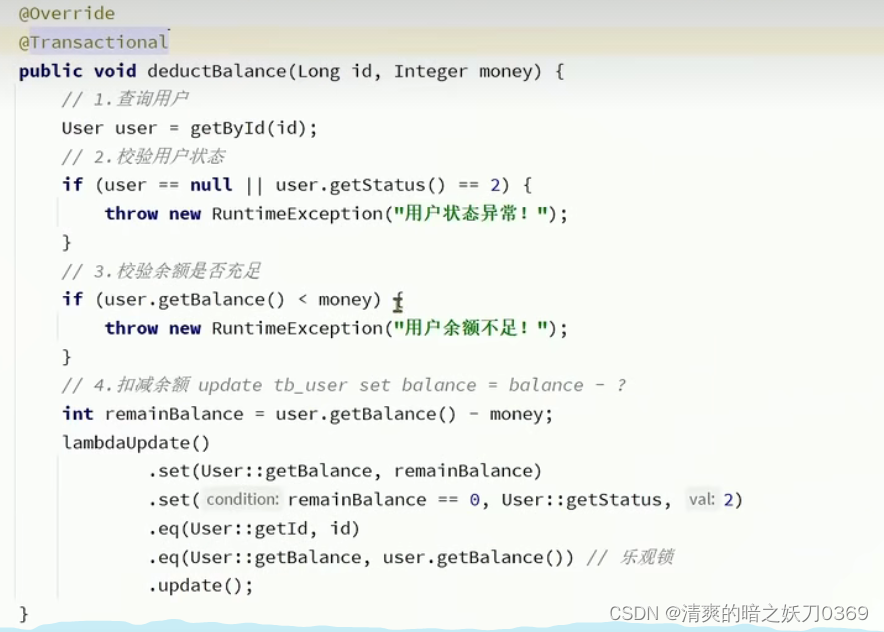
3、核心功能-IService开发Lambda方法
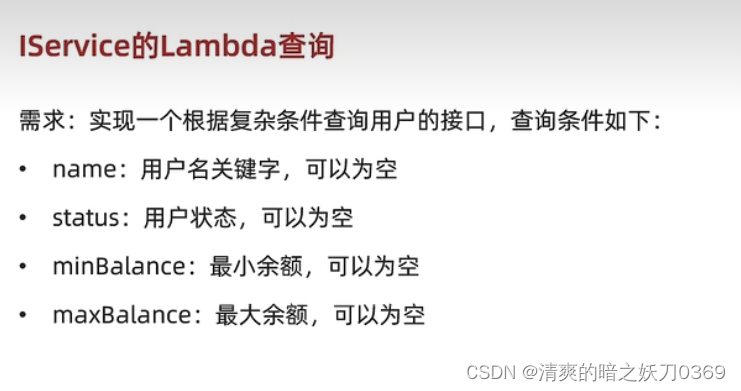
3.1、用Lambda实现下面的sql


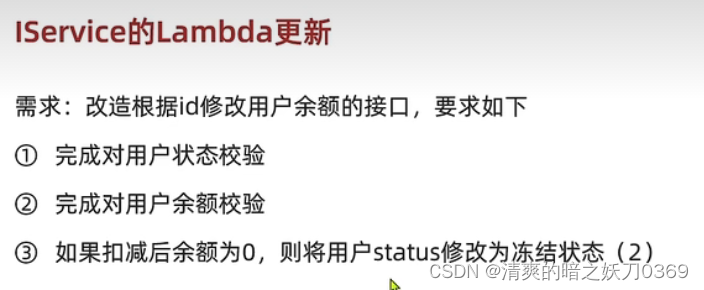
3.2、改造-修改
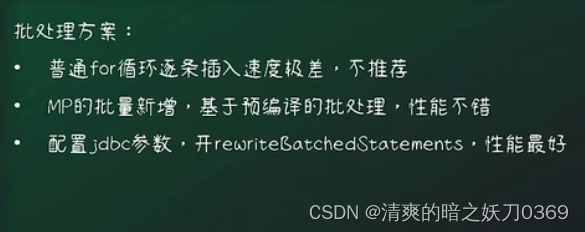
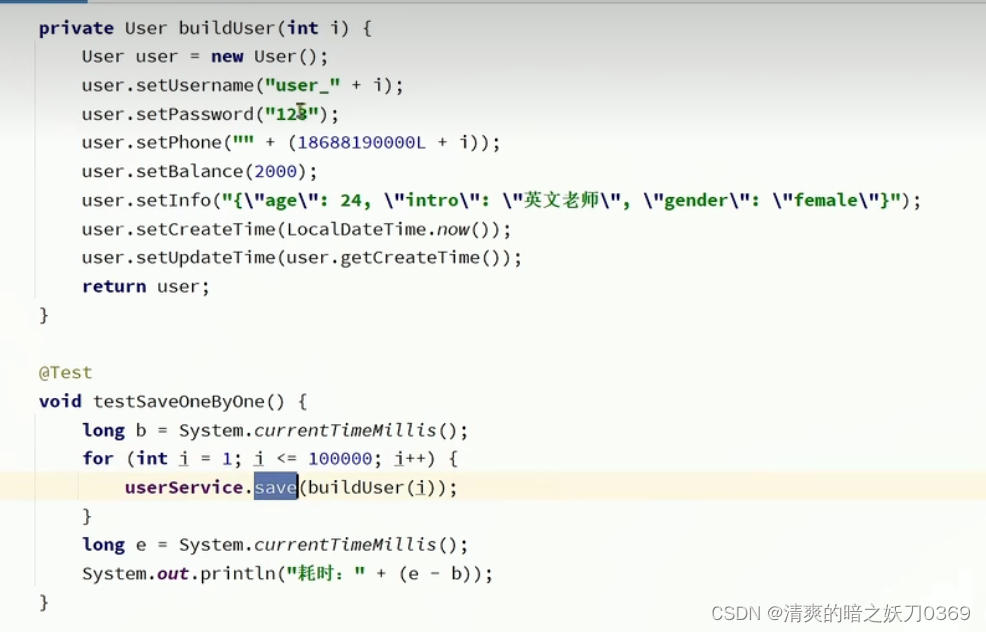
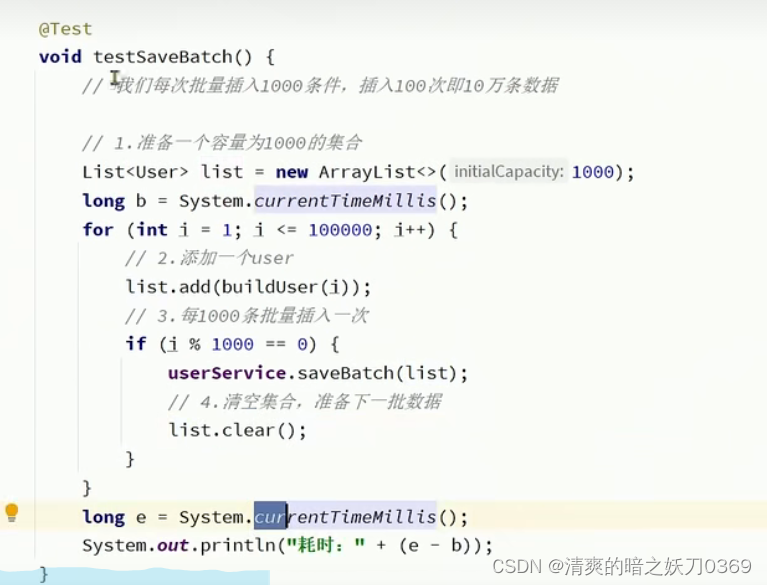
4、核心功能-IService批量新增

4.1、循环插入
4.2、批量插入
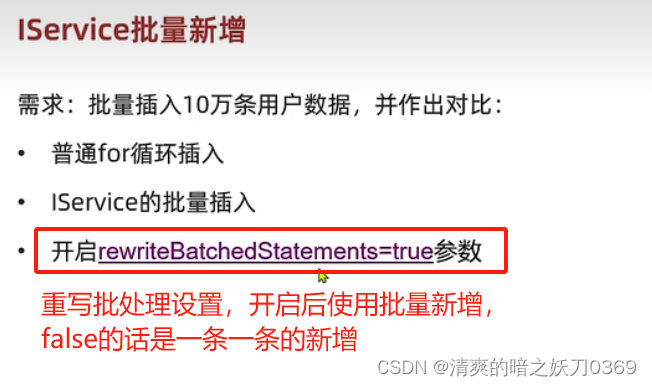
4.3、总结