链友咨询深圳seo优化推广

前言:Hello大家好,我是小哥谈。OpenCV不仅能够处理图像,还能够处理视频。视频是由大量的图像构成的,这些图像是以固定的时间间隔从视频中获取的。这样,就能够使用图像处理的方法对这些图像进行处理,进而达到处理视频的目的。要想处理视频,需要先对视频进行读取、显示、保存等相关操作。为此,OpenCV提供了VideoCapture类和VideoWrite类的相关方法。🌈
![]() 前期回顾:
前期回顾:
史上最全OpenCV常用方法及使用说明汇总,建议收藏!
OpenCV基础知识(1)— OpenCV概述
OpenCV基础知识(2)— 图像处理的基本操作
OpenCV基础知识(3)— 图像数字化基础(像素、色彩空间)
OpenCV基础知识(4)— 绘制图形
OpenCV基础知识(5)— 几何变换
OpenCV基础知识(6)— 滤波器
OpenCV基础知识(7)— 腐蚀与膨胀
OpenCV基础知识(8)— 图形检测
目录
🚀1.读取并显示摄像头视频
💥💥1.1 VideoCapture类
💥💥1.2 如何使用VideoCapture类
🚀2.播放视频文件
💥💥2.1 读取并显示视频文件
💥💥2.2 视频的暂停播放和继续播放
💥💥2.3 获取视频文件的属性
🚀3.保存视频文件
💥💥3.1 VideoWrite类
💥💥3.2 如何使用VideoWrite类
🚀4.总结

🚀1.读取并显示摄像头视频
💥💥1.1 VideoCapture类
摄像头视频指的是从摄像头中实时读取到的视频。为了读取并显示摄像头视频,OpenCV提供了VideoCapture类的相关方法,这些方法包括摄像头的初始化方法、检验摄像头初始化是否成功的方法、从摄像头中读取帧的方法、关闭摄像头的方法等。下面将依次对这些方法进行讲解。🌳
VideoCapture类提供了构造方法VideoCapture(),用于完成摄像头的初始化工作。
VideoCapture()的语法格式如下:
capture = cv2.VideoCapture(index)参数说明:
capture:要打开的摄像头
index:摄像头的设备索引。当index的值为0时,表示要打开的是第1个摄像头;对于64位的Windows10笔记本,当index的值为0时,表示要打开的是笔记本内置摄像头。当index的值为1的时候,表示要打开的是第2个摄像头;对于64位的Windows10笔记本,当index的值为1时,表示要打开的是一个连接笔记本的外置摄像头。
为了检验摄像头初始化是否成功,VideoCapture类提供了isOpened()方法。isOpened()方法的语法格式如下所示:
retval = cv2.VideoCapture.isOpened()参数说明:
retval:isOpened()方法的返回值。如果摄像头初始化成功,retval的值为True;否则,retval的值为False。
说明:♨️♨️♨️
1.视频是由大量的图像构成的,把这些图像称作帧。
2.摄像头的数量及其设备索引的先后顺序由操作系统决定,并且OpenCV没有提供查询摄像头的数量及其设备索引的任何方法。
摄像头初始化后,就可以从摄像头中读取帧了,为此VideoCapture类提供了read()方法。read()方法的语法格式如下:
retval,image = cv2.VideoCapture.read()参数说明:
retval:是否读取到帧。如果读取到帧,retval的值为True;否则,retval的值为False。
image:读取到的帧。因为帧指的是构成视频的图像,所以可以把“读取到的帧”理解为“读取到的图像”。
OpenCV在官网中特别强调,在不需要摄像头的时,要关闭摄像头。为此,VideoCapture类提供了release()方法,其语法格式如下:
cv2.VideoCapture.release()💥💥1.2 如何使用VideoCapture类
案例1:
读取并显示摄像头视频。具体代码如下:
import cv2capture = cv2.VideoCapture(0) # 打开笔记本内置摄像头
while (capture.isOpened()): # 笔记本内置摄像头被打开后retval, image = capture.read() # 从摄像头中实时读取视频cv2.imshow("Video", image) # 在窗口中显示读取到的视频key = cv2.waitKey(1) # 窗口的图像刷新时间为1毫秒if key == 32: # 如果按下空格键break
capture.release() # 关闭笔记本内置摄像头
cv2.destroyAllWindows() # 销毁显示摄像头视频的窗口
运行效果如图所示:
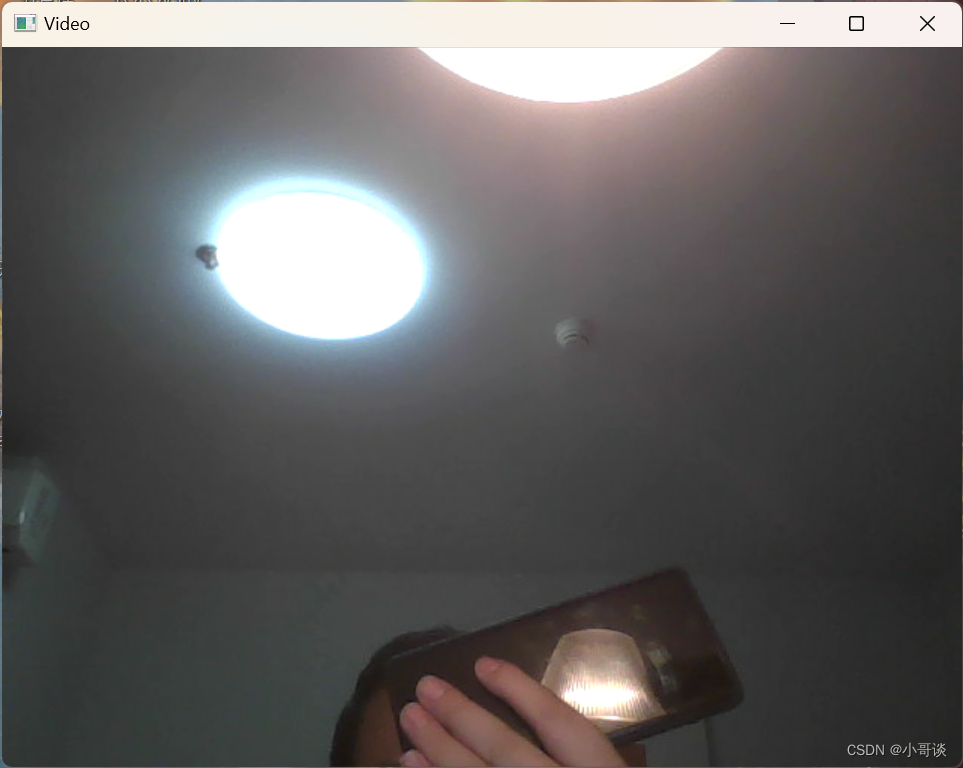
哈哈哈哈......,差点截到我,拿手机挡一下。🍉 🍓 🍑 🍈 🍌 🍐
如何关闭摄像头呢?其实很简单,按下空格键即可关闭笔记本内置摄像头,销毁显示摄像头视频的窗口。
当按下空格键后,PyCharm会显示如下图所示的警告信息。

为了消除该警告信息,需要将上述代码中的
capture = cv2.VideoCapture(0)修改为如下代码:
capture = cv2.VideoCapture(0,cv2.CAP_DSHOW)如果想打开的是一个连接笔记本的外置摄像头,那么需要将上述代码中的
capture = cv2.VideoCapture(0)修改为如下代码:
capture = cv2.VideoCapture(1,cv2.CAP_DSHOW)案例1已经成功读取并显示了摄像头视频,那么如何对这个视频进行处理呢?其实,处理视频所用的方法与处理图像所用的方法是相同的。具体请看案例2。
案例2:
将摄像头视频由彩色视频转换为灰度视频。具体代码如下所示:
import cv2capture = cv2.VideoCapture(0, cv2.CAP_DSHOW) # 打开笔记本内置摄像头
while (capture.isOpened()): # 笔记本内置摄像头被打开后retval, image = capture.read() # 从摄像头中实时读取视频# 把彩色视频转换为灰度视频image_Gray = cv2.cvtColor(image,cv2.COLOR_BGR2GRAY)if retval == True: # 读取到摄像头视频后cv2.imshow("Video", image) # 在窗口中显示彩色视频cv2.imshow("Video_Gray", image_Gray) # 在窗口中显示灰度视频key = cv2.waitKey(1) # 窗口的图像刷新时间为1毫秒if key == 32: # 如果按下空格键break
capture.release() # 关闭笔记本内置摄像头
cv2.destroyAllWindows() # 销毁显示摄像头视频的窗口
运行结果如图所示:
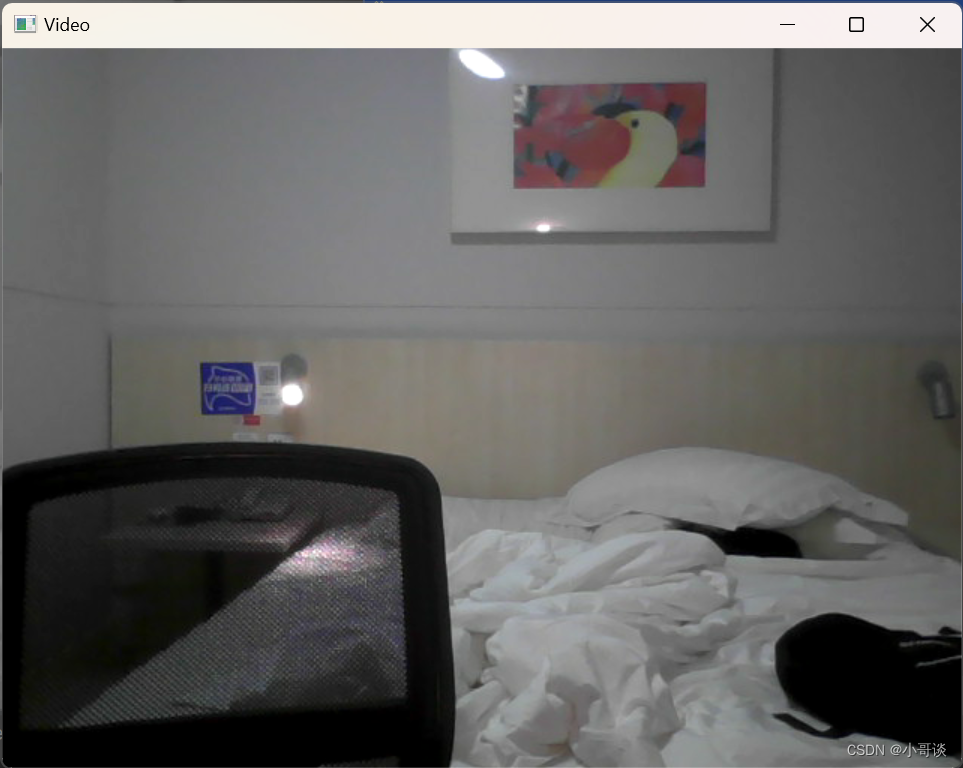

哈哈...截取到了我房间的图片。🍉 🍓 🍑 🍈 🍌 🍐
那么,能否通过按键指令,保存并显示摄像头某一时刻的图像?当然可以了!来,继续看案例3。
案例3:
显示并保存摄像头某一时刻的图像。当按下空格键的时候,关闭笔记本内置摄像头,保存并显示此时摄像头视频中的图像。具体代码如下:
import cv2cap = cv2.VideoCapture(0, cv2.CAP_DSHOW) # 打开笔记本内置摄像头
while (cap.isOpened()): # 笔记本内置摄像头被打开后ret, frame = cap.read() # 从摄像头中实时读取视频cv2.imshow("Video", frame) # 在窗口中显示视频k = cv2.waitKey(1) # 图像的刷新时间为1毫秒if k == 32: # 按下空格键cap.release() # 关闭笔记本内置摄像头cv2.destroyWindow("Video") # 销毁名为Video的窗口cv2.imwrite("D:/copy.png", frame) # 保存按下空格键时摄像头视频中的图像cv2.imshow('img', frame) # 显示按下空格键时摄像头视频中的图像cv2.waitKey() # 刷新图像break
cv2.destroyAllWindows() # 销毁显示图像的窗口
运行效果如图所示:

案例3除了能够显示摄像头视频某一时刻的图像外,还能够把上图保存在电脑根目录中(可自定义保存位置)。
保存的图像为:

案例1、案例2、案例3都是打开笔记本的内置摄像头,如果要在打开笔记本内置摄像头的同时,再打开一个连接笔记本的外置摄像头,应该如何实现呢?
案例4:
读取并显示两个摄像头视频。具体代码如下:
import cv2cap_Inner = cv2.VideoCapture(0, cv2.CAP_DSHOW) # 打开笔记本内置摄像头
cap_Outer = cv2.VideoCapture(1, cv2.CAP_DSHOW) # 打开一个连接笔记本的外置摄像头
while (cap_Inner.isOpened() & cap_Outer.isOpened()): # 两个摄像头都被打开后retval, img_Inner = cap_Inner.read() # 从笔记本内置摄像头中实时读取视频ret, img_Outer = cap_Outer.read() # 从连接笔记本的外置摄像头中实时读取视频# 在窗口中显示笔记本内置摄像头读取到的视频cv2.imshow("Video_Inner", img_Inner)# 在窗口中显示连接笔记本的外置摄像头读取到的视频cv2.imshow("Video_Outer", img_Outer)key = cv2.waitKey(1) # 窗口的图像刷新时间为1毫秒if key == 32: # 如果按下空格键break
cap_Inner.release() # 关闭笔记本内置摄像头
cap_Outer.release() # 关闭连接笔记本的外置摄像头
cv2.destroyAllWindows() # 销毁显示摄像头视频的窗口
运行效果就不演示了,大家可以自己试验下。(我没外置摄像头)📚
🚀2.播放视频文件
VideoCapture类及其方法除了能够读取并显示摄像头视频外,还能够读取并显示视频文件。当窗口根据视频文件的时长显示视频文件的时候,便实现了播放视频文件的效果。
💥💥2.1 读取并显示视频文件
VideoCapture类的构造方法VideoCapture()不仅能够用于完成摄像头的初始化工作,还能够用于完成视频文件的初始化工作。
当VideoCapture()用于初始化视频文件的时候,其语法格式如下:
video = cv2.VideoCapture(filename)参数说明:
video:要打开的视频
filename:打开视频的文件名。
案例5:
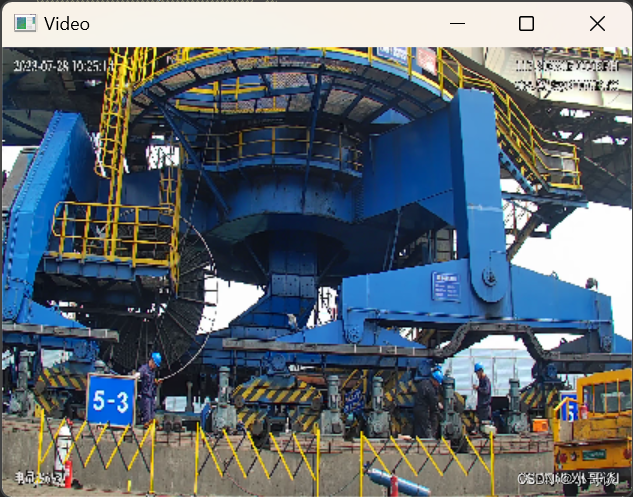
读取并显示视频文件。当按下【Esc】键时,关闭视频文件并销毁显示视频文件的窗口。就以我在港口现场拍摄的高风险作业视频为例。具体代码如下所示:
import cv2video = cv2.VideoCapture("1.mp4") # 打开视频文件
while (video.isOpened()): # 视频文件被打开后retval, image = video.read() # 读取视频文件# 设置“Video”窗口的宽为420,高为300cv2.namedWindow("Video", 0)cv2.resizeWindow("Video", 420, 300)if retval == True: # 读取到视频文件后cv2.imshow("Video", image) # 在窗口中显示读取到的视频文件else: # 没有读取到视频文件breakkey = cv2.waitKey(1) # 窗口的图像刷新时间为1毫秒if key == 27: # 如果按下Esc键break
video.release() # 关闭视频文件
cv2.destroyAllWindows() # 销毁显示视频文件的窗口
运行效果如图所示:

说明:♨️♨️♨️
调整waitKey()方法中的参数值可以控制视频文件的播放速度。例如,当cv2.waitKey(1)时,视频文件的播放速度非常快;当cv2.waitKey(50)时,就可以减缓视频文件的播放速度。
使用图像处理的相关方法可以把摄像头视频由彩色视频转换为灰度视频。那么,使用相同的方法,也能够将视频文件由彩色视频转换为灰度视频。
案例6:
将视频文件由彩色视频转换为灰度视频。具体代码如下所示:
import cv2video = cv2.VideoCapture("1.mp4") # 打开视频文件
while (video.isOpened()): # 视频文件被打开后retval, img_Color = video.read() # 读取视频文件# 设置“Video”窗口的宽为420,高为300cv2.namedWindow("Gray", 0)cv2.resizeWindow("Gray", 420, 300)if retval == True: # 读取到视频文件后# 把“公司宣传.avi”由彩色视频转换为灰度视频img_Gray = cv2.cvtColor(img_Color, cv2.COLOR_BGR2GRAY)cv2.imshow("Gray", img_Gray) # 在窗口中显示读取到的视频文件else: # 没有读取到视频文件breakkey = cv2.waitKey(1) # 窗口的图像刷新时间为1毫秒if key == 27: # 如果按下Esc键break
video.release() # 关闭视频文件
cv2.destroyAllWindows() # 销毁显示视频文件的窗口
运行效果如图所示:

💥💥2.2 视频的暂停播放和继续播放
上述案例已经实现了在窗口中播放视频文件的效果。那么,能否在此基础上,通过按键指令,在播放视频的过程中,实现视频的暂停播放和继续播放呢?答案肯定是可以的了!✅
案例7:
视频的暂停播放和继续播放。当按下空格键的时候,暂停播放视频;当再次按下空格键的时候,继续播放视频;当按下【Esc】键时,关闭视频文件并销毁显示视频文件的窗口。
具体代码如下所示:
import cv2video = cv2.VideoCapture("1.mp4") # 打开视频文件
while (video.isOpened()): # 视频文件被打开后retval, image = video.read() # 读取视频文件# 设置“Video”窗口的宽为420,高为300cv2.namedWindow("Video", 0)cv2.resizeWindow("Video", 420, 300)if retval == True: # 读取到视频文件后cv2.imshow("Video", image) # 在窗口中显示读取到的视频文件else: # 没有读取到视频文件breakkey = cv2.waitKey(50) # 窗口的图像刷新时间为50毫秒if key == 32: # 如果按下空格键cv2.waitKey(0) # 不刷新图像,实现暂停效果continue # 再按一次空格键,继续播放if key == 27: # 如果按下Esc键break
video.release() # 关闭视频文件
cv2.destroyAllWindows() # 销毁显示视频文件的窗口
运行效果如图所示:
💥💥2.3 获取视频文件的属性
在实际开发过程中,有时候需要获取视频文件的属性。为此,VideoCapture类提供了get()方法。get()方法的语法格式如下所示:
retval = cv2.VideoCapture.get(propID)参数说明:
retval:获取到与propID对应的属性值
propID:视频文件的属性值
VideoCapture类提供视频文件的属性值及其含义如下表所示:
| 视频文件的属性值 | 含义 |
| cv2.CAP_PROP_POS_MSEC | 视频文件播放时的当前位置(单位:ms) |
| cv2.CAP_PROP_POS_FRAMES | 帧的索引,从0开始。 |
| cv2.CAP_PROP_POS_AVI_RATIO | 视频文件的相对位置(0表示开始播放,1表示结束播放) |
| cv2.CAP_PROP_FRAME_WIDTH | 视频文件的帧宽度 |
| cv2.CAP_PROP_FRAME_HEIGHT | 视频文件的帧高度 |
| cv2.CAP_PROP_FPS | 帧速率 |
| cv2.CAP_PROP_FOURCC | 用4个字符表示的视频编码格式 |
| cv2.CAP_PROP_FRAME_COUNT | 视频文件的帧数 |
| cv2.CAP_PROP_FORMAT | retrieve()方法返回的Mat对象的格式 |
| cv2.CAP_PROP_MODE | 指示当前捕获模式的后端专用的值 |
| cv2.CAP_PROP_CONVERT_RGB | 指示是否应将图像转换为RGB |
说明:♨️♨️♨️
1.视频是由大量的、连续的图像构成的,把其中的每一幅图像称作一帧。
2.帧数指的是视频文件中含有的图像总数,帧数越多,视频播放时越流畅。
3.在播放视频的过程中,把每秒显示图像的数量称作帧速率(FPS,单位:帧/s)
4.帧的宽度指的是图像在水平方向上含有的像素总数。
5.帧的高度指的是图像在垂直方向上含有的像素总数。
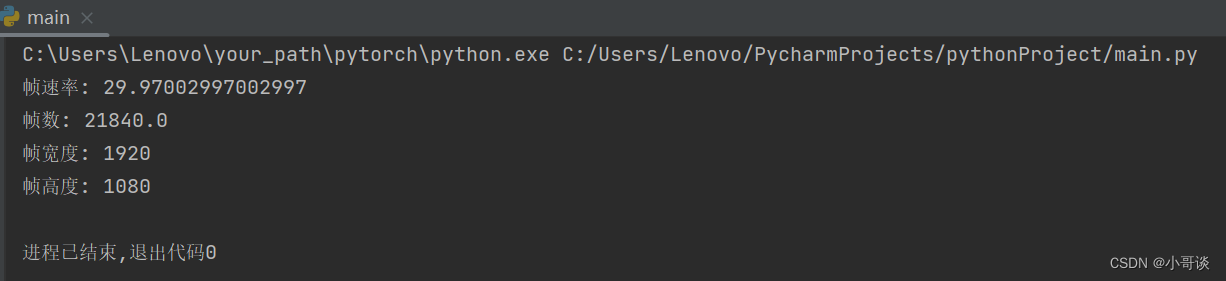
案例8:
获取并输出视频文件的指定属性值。具体代码如下:
import cv2video = cv2.VideoCapture("1.mp4") # 打开视频文件
fps = video.get(cv2.CAP_PROP_FPS) # 获取视频文件的帧速率
frame_Count = video.get(cv2.CAP_PROP_FRAME_COUNT) # 获取视频文件的帧数
frame_Width = int(video.get(cv2.CAP_PROP_FRAME_WIDTH)) # 获取视频文件的帧宽度
frame_Height = int(video.get(cv2.CAP_PROP_FRAME_HEIGHT)) # 获取视频文件的帧高度
# 输出获取到的属性值
print("帧速率:", fps)
print("帧数:", frame_Count)
print("帧宽度:", frame_Width)
print("帧高度:", frame_Height)
运行效果如图所示:
那么,能否使得窗口在播放视频文件的同时,动态显示当前视频文件的属性值?例如,当前视频播放到第几帧,该帧对应着视频第几秒等。
案例9:
动态显示视频文件的属性值。具体代码如下所示:
import cv2video = cv2.VideoCapture("1.mp4") # 打开视频文件
fps = video.get(cv2.CAP_PROP_FPS) # 获取视频文件的帧速率
frame_Num = 1 # 用于记录第几幅图像(即第几帧),初始值为1(即第1幅图像)
while (video.isOpened()): # 视频文件被打开后retval, frame = video.read() # 读取视频文件# 设置“Video”窗口的宽为420,高为300cv2.namedWindow("Video", 0)cv2.resizeWindow("Video", 420, 300)if retval == True: # 读取到视频文件后# 当前视频播放到第几帧cv2.putText(frame, "frame: " + str(frame_Num), (0, 100),cv2.FONT_HERSHEY_SIMPLEX, 2, (0, 0, 255), 5)# 该帧对应着视频的第几秒cv2.putText(frame, "second: " + str(round(frame_Num / fps, 2)) + "s",(0, 200), cv2.FONT_HERSHEY_SIMPLEX, 2, (0, 0, 255), 5)cv2.imshow("Video", frame) # 在窗口中显示读取到的视频文件else: # 没有读取到视频文件breakkey = cv2.waitKey(50) # 窗口的图像刷新时间为50毫秒frame_Num += 1 #if key == 27: # 如果按下Esc键break
video.release() # 关闭视频文件
cv2.destroyAllWindows() # 销毁显示视频文件的窗口
运行效果如图所示:

🚀3.保存视频文件
在实际开发过程中,很多时候希望保存一段视频。为此,OpenCV提供了VideoWrite类,下面就熟悉一下VideoWrite类的常用方法。
💥💥3.1 VideoWrite类
VideoWrite类的常用方法包括VideoWrite类的构造方法、write()方法和release()方法。其中,VideoWrite类的构造方法用于创建VideoWrite类对象,其语法格式如下:
<VideoWrite object> = cv2.VideoWrite(filename,fourcc,fps,frameSize)参数说明:
VideoWrite object:VideoWrite类对象
filename:保存视频时的路径(含有文件名)
fourcc:用4个字符表示的视频编码格式
fps:帧速率
frameSize:每一帧的大小
在OpenCV中,使用cv2.VideoWrite_fourcc()来确定视频编码格式。
下表列出了几个常用的视频编码格式。
| fourcc的值 | 视频编码格式 | 文件扩展名 |
| cv2.VideoWrite_fourcc('1','4','2','0') | 未压缩的YUV颜色编码格式,兼容性好,但文件较大。 | .avi |
| cv2.VideoWrite_fourcc('P','I','M','I') | MPEG-1编码格式 | .avi |
| cv2.VideoWrite_fourcc('X','V','I','D') | MPEG-4编码格式,视频文件的大小为平均值。 | .avi |
| cv2.VideoWrite_fourcc('T','H','E','O') | Ogg Vorbis编码格式,兼容性差。 | .ogv |
| cv2.VideoWrite_fourcc('F','L','V','I') | Flash视频编码格式 | .flv |
💥💥3.2 如何使用VideoWrite类
案例10:
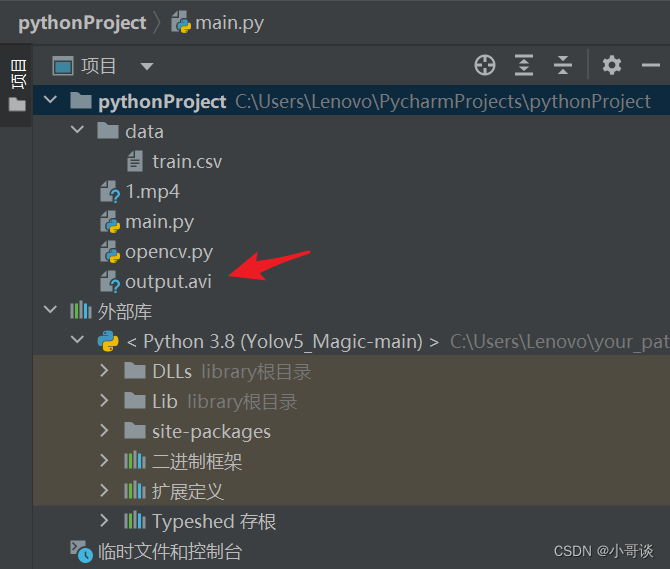
保存一段摄像头视频。打开笔记本内置摄像头,实时读取并显示视频;然后按下【Esc】键,关闭笔记本内置摄像头,销毁显示摄像头视频的窗口,并且把打开摄像头到关闭摄像头的这段视频保存为PyCharm当前项目路径下的output.avi文件。具体代码如下所示:
import cv2capture = cv2.VideoCapture(0, cv2.CAP_DSHOW) # 打开笔记本内置摄像头
fourcc = cv2.VideoWriter_fourcc('X', 'V', 'I', 'D') # 确定视频被保存后的编码格式
output = cv2.VideoWriter("output.avi", fourcc, 20, (640, 480)) # 创建VideoWriter类对象
while (capture.isOpened()): # 笔记本内置摄像头被打开后retval, frame = capture.read() # 从摄像头中实时读取视频if retval == True: # 读取到摄像头视频后output.write(frame) # 在VideoWriter类对象中写入读取到的帧cv2.imshow("frame", frame) # 在窗口中显示摄像头视频key = cv2.waitKey(1) # 窗口的图像刷新时间为1毫秒if key == 27: # 如果按下Esc键break
capture.release() # 关闭笔记本内置摄像头
output.release() # 释放VideoWriter类对象
cv2.destroyAllWindows() # 销毁显示摄像头视频的窗口当按下【Esc】键的时候,会在PyCharm当前项目目录下生成一个名为“output.avi”的视频文件。双击该视频文件,即可浏览被保存的摄像头视频。
说明:♨️♨️♨️
如果重复运行,新产生的output.avi文件会覆盖已经存在的output.avi文件。
上述案例录制的视频文件时长是由是否按下【Esc】键决定的,那么能否对这段时间间隔进行设置呢?例如,打开摄像头并显示10s的摄像头视频。答案是可以的!
案例11:
保存一段时长为10s的摄像头视频。具体代码如下:
import cv2capture = cv2.VideoCapture(0, cv2.CAP_DSHOW) # 打开笔记本内置摄像头
fourcc = cv2.VideoWriter_fourcc('X', 'V', 'I', 'D') # 确定视频被保存后的编码格式
fps = 20 # 帧速率
# 创建VideoWriter类对象
output = cv2.VideoWriter("ten_Seconds.avi", fourcc, fps, (640, 480))
frame_Num = 10 * fps # 时长为10秒的摄像头视频含有的帧数
# 笔记本内置摄像头被打开且时长为10秒的摄像头视频含有的帧数大于0
while (capture.isOpened() and frame_Num > 0):retval, frame = capture.read() # 从摄像头中实时读取视频if retval == True: # 读取到摄像头视频后output.write(frame) # 在VideoWriter类对象中写入读取到的帧cv2.imshow("frame", frame) # 在窗口中显示摄像头视频key = cv2.waitKey(1) # 窗口的图像刷新时间为1毫秒frame_Num -= 1 # 时长为10秒的摄像头视频含有的帧数减少一帧
capture.release() # 关闭笔记本内置摄像头
output.release() # 释放VideoWriter类对象
cv2.destroyAllWindows() # 销毁显示摄像头视频的窗口
运行效果如图所示:

VideoWrite类不仅能保存摄像头视频,还能保存视频文件,而且保存视频文件与保存摄像头的步骤是相同的。
案例12:
保存视频文件。具体代码如下:
import cv2video = cv2.VideoCapture("1.mp4") # 打开视频文件
fps = video.get(cv2.CAP_PROP_FPS) # 获取视频文件的帧速率
# 获取视频文件的帧大小
size = (int(video.get(cv2.CAP_PROP_FRAME_WIDTH)),int(video.get(cv2.CAP_PROP_FRAME_HEIGHT)))
fourcc = cv2.VideoWriter_fourcc('X', 'V', 'I', 'D') # 确定视频被保存后的编码格式
output = cv2.VideoWriter("copy.avi", fourcc, fps, size) # 创建VideoWriter类对象
while (video.isOpened()): # 视频文件被打开后retval, frame = video.read() # 读取视频文件if retval == True: # 读取到视频文件后output.write(frame) # 在VideoWriter类对象中写入读取到的帧else:break
print("公司宣传.avi已经保存为PyCharm当前项目路径下的copy.avi。") # 控制台输出提示信息
video.release() # 关闭视频文件
output.release() # 释放VideoWriter类对象
运行效果如图所示:
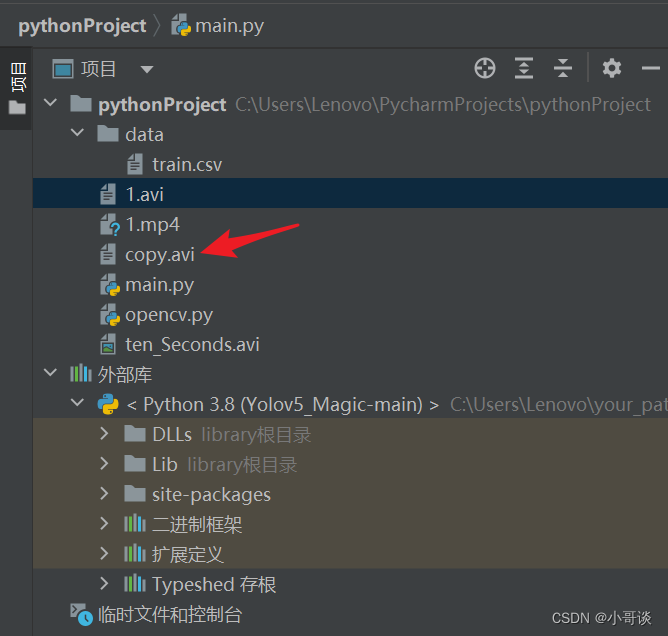
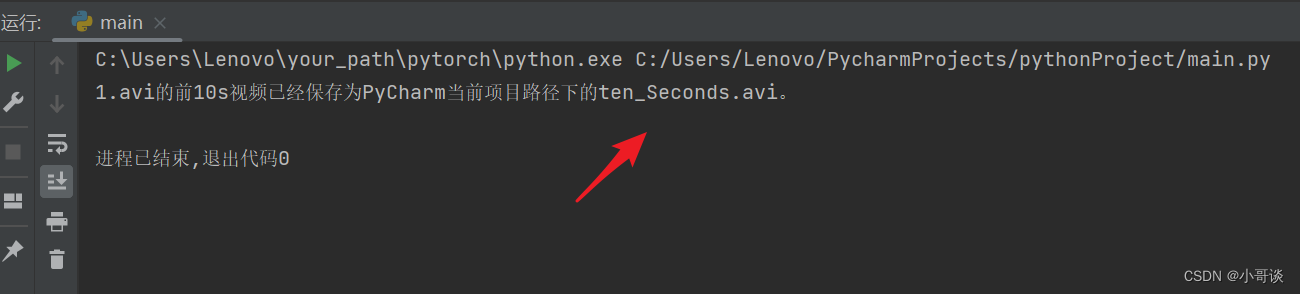
案例13:
保存视频文件的前10s视频。
import cv2video = cv2.VideoCapture("1.avi") # 打开视频文件
fps = video.get(cv2.CAP_PROP_FPS) # 获取视频文件的帧速率
# 获取视频文件的帧大小
size = (int(video.get(cv2.CAP_PROP_FRAME_WIDTH)),int(video.get(cv2.CAP_PROP_FRAME_HEIGHT)))
fourcc = cv2.VideoWriter_fourcc('X', 'V', 'I', 'D') # 确定视频被保存后的编码格式
output = cv2.VideoWriter("ten_Seconds.avi", fourcc, fps, size) # 创建VideoWriter类对象
frame_Num = 10 * fps # 视频文件的前10秒视频含有的帧数
# 视频文件被打开后且视频文件的前10秒视频含有的帧数大于0
while (video.isOpened() and frame_Num > 0):retval, frame = video.read() # 读取视频文件if retval == True: # 读取到视频文件后output.write(frame) # 在VideoWriter类对象中写入读取到的帧frame_Num -= 1 # 视频文件的前10秒视频含有的帧数减少一帧
# 控制台输出提示信息
print("公司宣传.avi的前10s视频已经保存为PyCharm当前项目路径下的ten_Seconds.avi。")
video.release() # 关闭视频文件
output.release() # 释放VideoWriter类对象
运行效果如图所示:
🚀4.总结
(1)读取并显示摄像头视频
🍀VideoCapture类
- 构造方法VideoCapture()
- isOpened()方法
- read()方法
- release()方法
🍀如何使用VideoCapture类
- 读取并显示摄像头视频
- 摄像头视频由彩色视频转换为灰度视频
- 显示并保存摄像头视频某一刻的图像
- 读取并显示两个摄像头视频
(2)播放视频文件
🍀读取并显示视频文件
- video = cv2.VideoCapture(filename)
🍀视频的暂停播放和继续播放
🍀获取视频文件的属性
- retval = cv2.VideoCapture.get(propID)
(3)保存视频文件
🍀VideoWrite类
- 构造方法VideoWrite()
- write()方法
- release()方法
🍀如何使用VideoWrite类
- 保存一段摄像头视频
- 保存一段时长为10s的摄像头视频
- 保存视频文件
- 保存视频文件中的前10s视频