开发一个网站多少钱啊备案域名出售平台
有些场景我们不需要编译器默认实现的构造函数,拷贝构造函数,赋值函数,这时候我们应该明确的告诉编译器,我们不需要,一个可行的方法是将拷贝构造函数和赋值函数声明为private。
class HomeForSale { ... };
HomeForSale h1;
HomeForSale h2;
HomeForSale h3(h1); 	// 试图拷贝h1,应该阻止编译通过
h1 = h2; 		// 试图拷贝h2,应该阻止编译通过
每一栋房子都不同,这样的拷贝不应该支持。
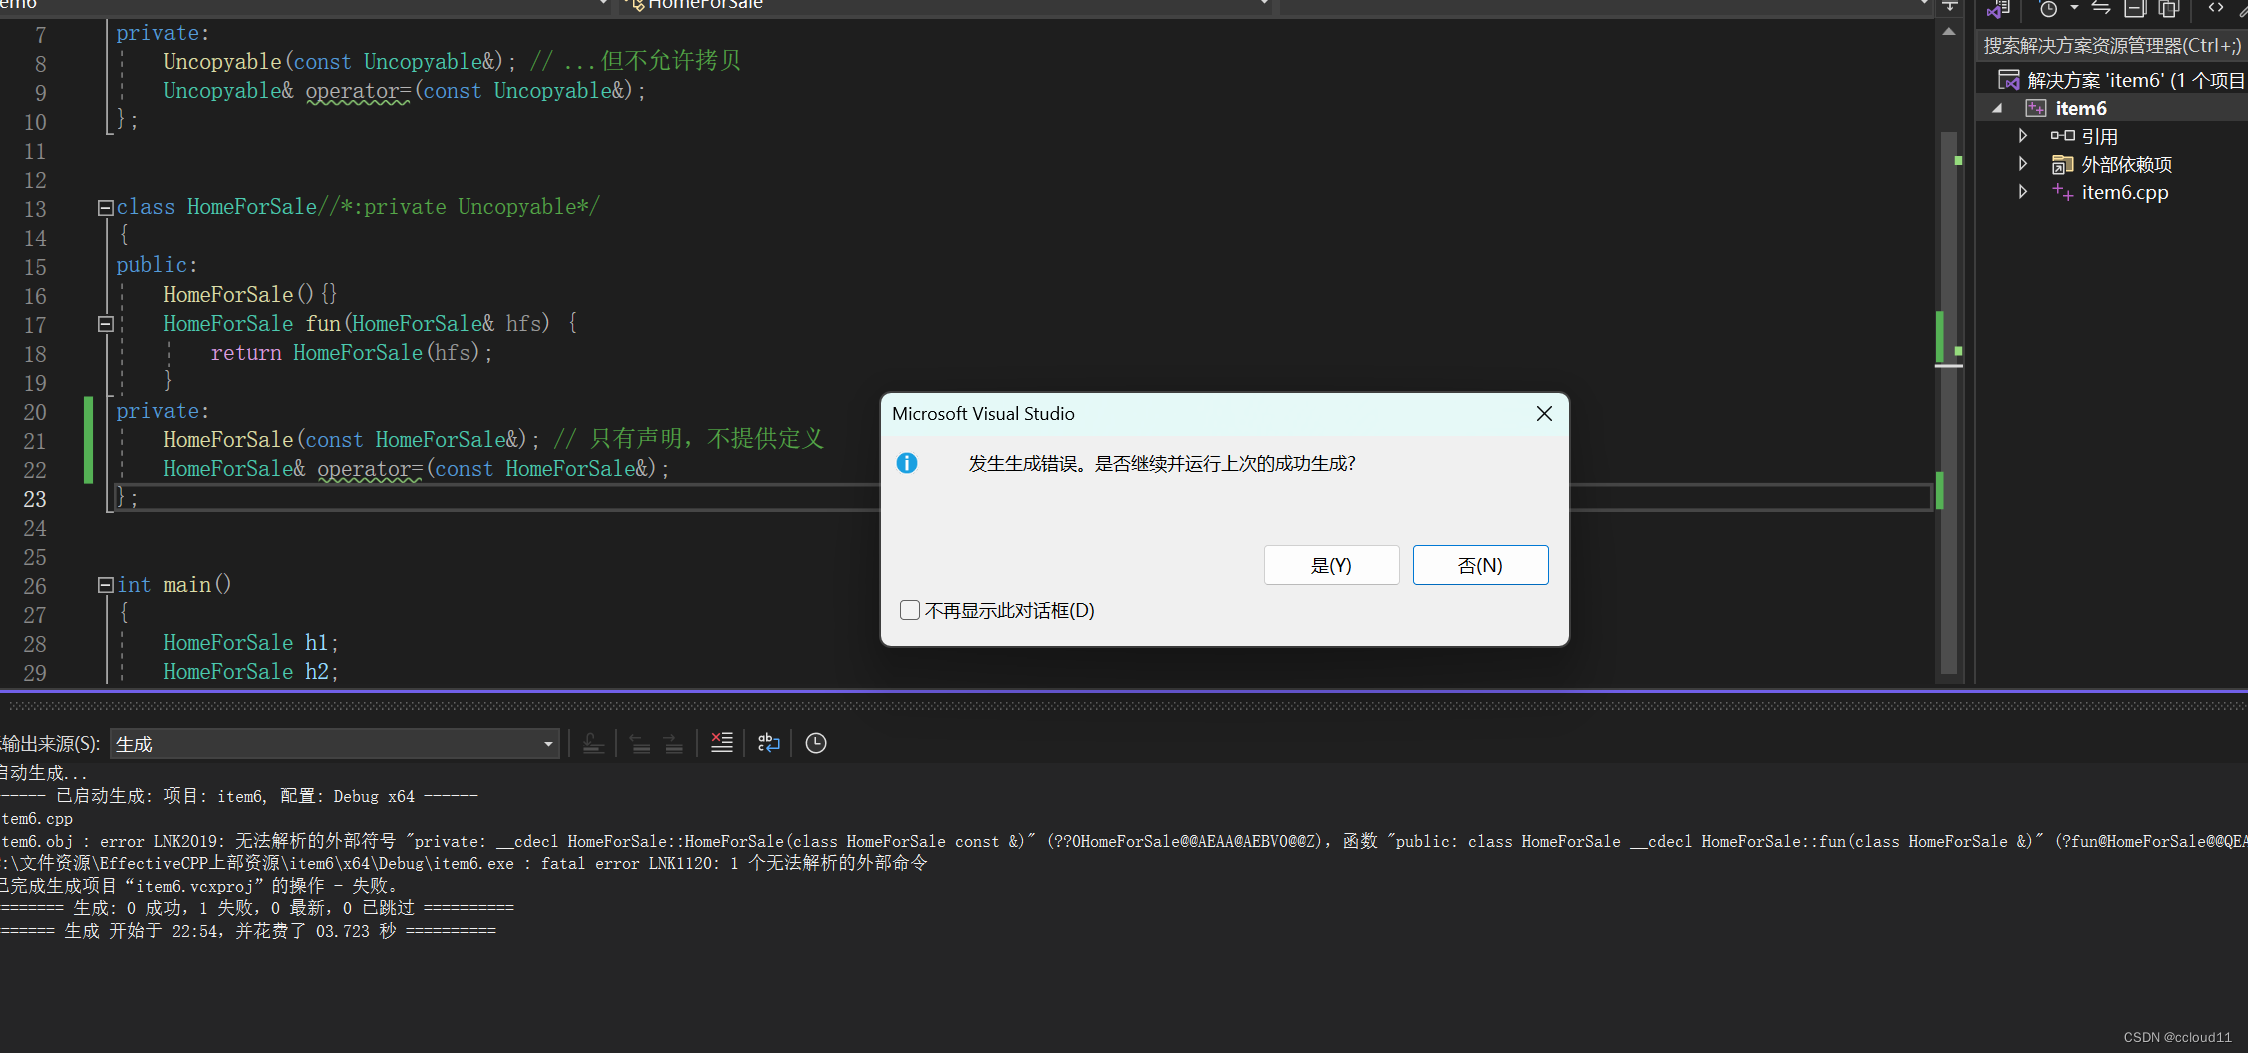
但是这样也会存在一个问题,因为成员函数和友元函数仍然可以调用私有函数。
class HomeForSale {
public:...
private:...HomeForSale(const HomeForSale&); // 只有声明,不提供定义HomeForSale& operator=(const HomeForSale&);
};
我们可以使用上面的类定义,编译器将阻止客户端拷贝HomeForSale对象的尝试,如果无意中试图在成员函数或友元函数中这样做,链接器将会报错。
class Uncopyable {
protected: // 允许派生类对象的构造和析构Uncopyable() {} ~Uncopyable() {}
private:Uncopyable(const Uncopyable&); // ...但不允许拷贝Uncopyable& operator=(const Uncopyable&);
};
class HomeForSale : private Uncopyable { //不再声明拷贝构造函数或拷贝赋值运算符
…
};
在c++11的标准中我们可以使用delete来删除函数,这样在编译的时候就会提示错误。

要禁用编译器自动提供的功能,请将相应的成员函数声明为private并且不提供任何实现。使用像Uncopyable这样的基类是一种方法。